
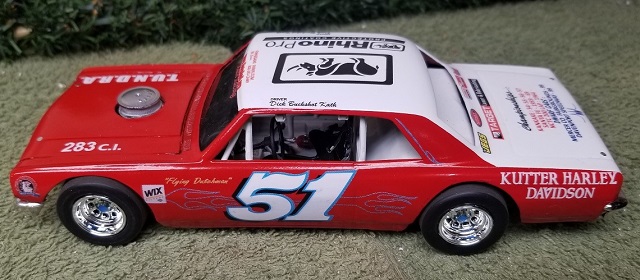
Circle Track Tire Decals
Take your build to the next level with Tire Decals by Dynomite Decals.

TD_1
McCreary Tire Decals
TD_1 McCreary Tire Decals. Sold in sets of four. Decals must be cut out and trimmed by builder. Tire not included.
Just $2.00 per set plus shipping.

TD_2
Modern Hoosier Tire Decals
TD_2 Modern Hoosier Tire Decals. Sold in sets of four. Decals must be cut out and trimmed by builder. Tire not included.
Just $2.00 per set plus shipping.

TD_3
Vintage Hoosier Tire Decals
D_3 Vintage Hoosier Tire Decals. Sold in sets of four. Decals must be cut out and trimmed by builder. Tire not included.
Just $2.00 per set plus shipping.

TD_4
American Racer Tire Decals
TD_4 American Racer Tire Decals. Sold in sets of four. Decals must be cut out and trimmed by builder. Tire not included.
Just $4.00 per set plus shipping.

TD_5
Goodyear Eagle Tire Decals
TD_5 Goodyear Eagle Tire Decals. Decals must be cut out and trimmed by builder. Tire not included.
Just $4.00 per set plus shipping.

TD_6
Firestone Tire Decals
TD_6 Firestone Tire Decals. Decals must be cut out and trimmed by builder. Tire not included.
Just $2.00 per set plus shipping.
Circle Track Accessory Decals
Take your build to the next level with Accessory Decals by Dynomite Decals.

DD_1
Hood / Deck Lid Decals
DD_1 The DD_1 is a classic 1:25 scale hairpin style hood and deck lid pin. Printed chrome, outlined in black, on clear decal paper. 4 to a set. Plate is 3mm in diameter. Decals must be cut out and trimmed by builder.
Just $2.00 per set plus shipping.

DD_2
Hood / Deck Lid Decals
DD_2 The DD_2 is a modern 1:25 scale Q/Clip/Torsion style hood and deck lid pin used on more modern style race cars. Printed chrome, outlined in black, on clear decal paper. 4 to a set. Plate is 3mm in diameter. Decals must be cut out and trimmed by builder.
Just $2.00 per set plus shipping.

DD_3
Driver’s Compartment Decals
DD_3 The DD_3 is a Longacre style package that consists of one four gauge panel, one battery disconnect switch, one fuel shut off valve, and one aircraft style ignition switch. Printed on clear decal paper with chrome accents! Decals must be cut out and trimmed by builder. Gauge panel measures 24mm x 8mm.
Just $3.50 per set plus shipping.

DD_4
Pop Rivet Decals
DD_4 Tired of trying to dab pop rivets on your builds? If so the DD_4 pop rivet decals are for you! Printed chrome with black accents printed on clear decal paper. Order is 30 rivets per order. Must be cut out and trimmed trimmed by builder.
Just $2.00 per set plus shipping.

DD_2
Hood / Deck Lid Decals
DD_2 The DD_2 is a modern 1:25 scale Q/Clip/Torsion style hood and deck lid pin used on more modern style race cars. Printed chrome, outlined in black, on clear decal paper. 4 to a set. Plate is 3mm in diameter. Decals must be cut out and trimmed by builder.
Just $2.00 per set plus shipping.
DD_3
Driver’s Compartment Decals
DD_3 The DD_3 is a Longacre style package that consists of one four gauge panel, one battery disconnect switch, one fuel shut off valve, and one aircraft style ignition switch. Printed on clear decal paper with chrome accents! Decals must be cut out and trimmed by builder. Gauge panel measures 24mm x 8mm.
Just $3.50 per set plus shipping.
Dynomite Decals make a huge difference in the overall look of any build.
For the best results the following is suggested:
- Tire surface must be smooth and have semi gloss or gloss finish.
- Trim decals as close as possible using a new hobby or scalpel blade.
- Apply a small amount of water, vinegar, or any decal solution to the tire.
- Using smooth jaw tweezers immerse decal in room temperature water keeping the decal between the jaws of the tweezers.
- Allow decal to soak until it separates from backing, approximately 15 – 20 seconds, then remove decal and backing paper from water still in the jaws of the tweezers.
- Position decal and gently slide it on to the surface.
- Apply a small amount of decal solution to the decal and make the final positioning.
- After decal is dry seal it with clear coat. Acrylic clears can be used same day. If using lacquer, enamel, or 2K a 24 hour waiting period is suggested.
Custom Decals by Dynomite Decals
[/ultimate_heading]For All Your Custom Decal Needs
Take your builds to the next level with custom decals by Dennis & Karie Satorius at Dynomite Decals. No job too big or too small.
For further information or a quote contact Dennis at satoriusracing@yahoo.com and make sure to let him know Ron Coon Resins sent you his way.